FFMPEG is a free, open-source command-line tool, mainly used for video editing, with almost endless uses. YouTube and iTunes are known for using it behind the scenes and Twitter and Facebook also use it, among many other companies. A large amount of software you have probably utilises FFMPEG, because it supports almost any video and audio types that exist. Learning the fundamentals of FFMPEG is pretty straightforward, and ends up being a lot faster than using something like an 'online converter'. Playing around with everything it can do is pretty fun.
Installing command-line tools on Windows can be a little tricky if you've never done it before, so this is a guide teaching you how to correctly install it.
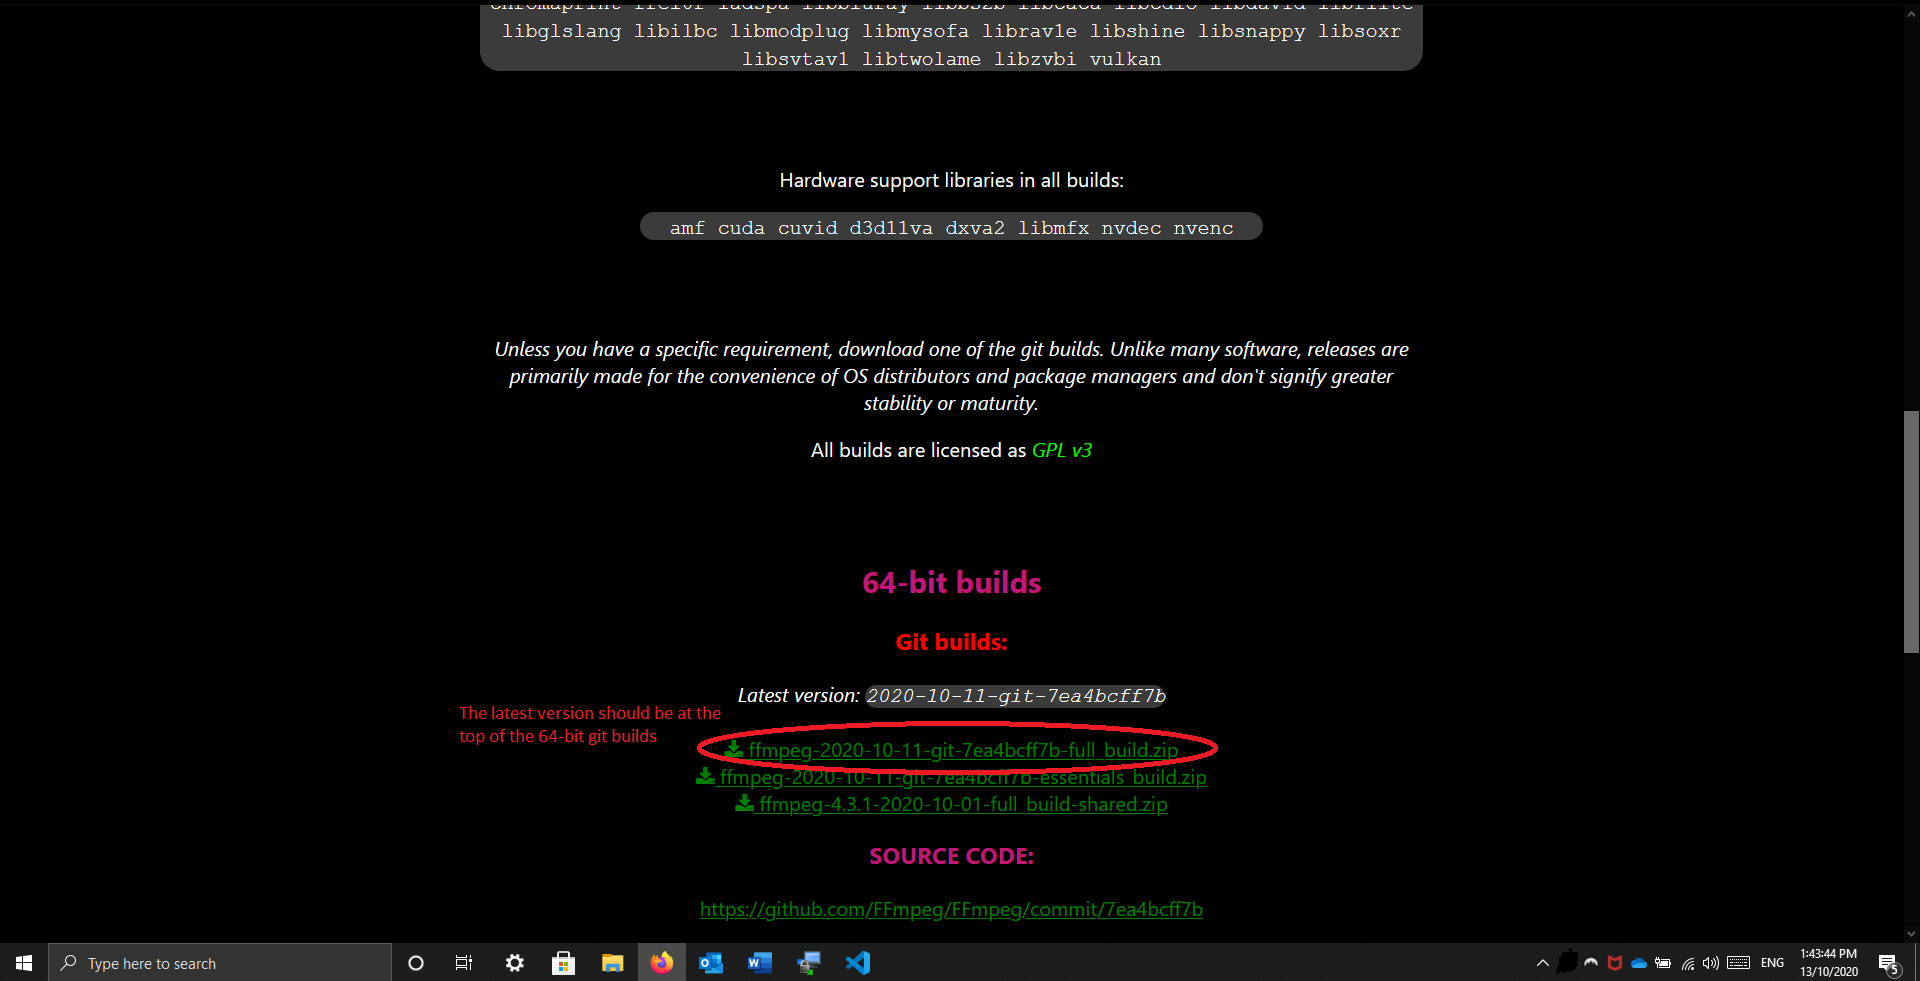
I host the latest versions of FFMPEG on my site. They can be found here. FFMPEG for Windows is also hosted on a few other sites, so if you want to get FFMPEG from there instead, have a look at the links ffmpeg.org provides.
If you're downloading it from my site, you should find the latest version when you scroll down a bit. Choose the full version for some extra functionality. See below.
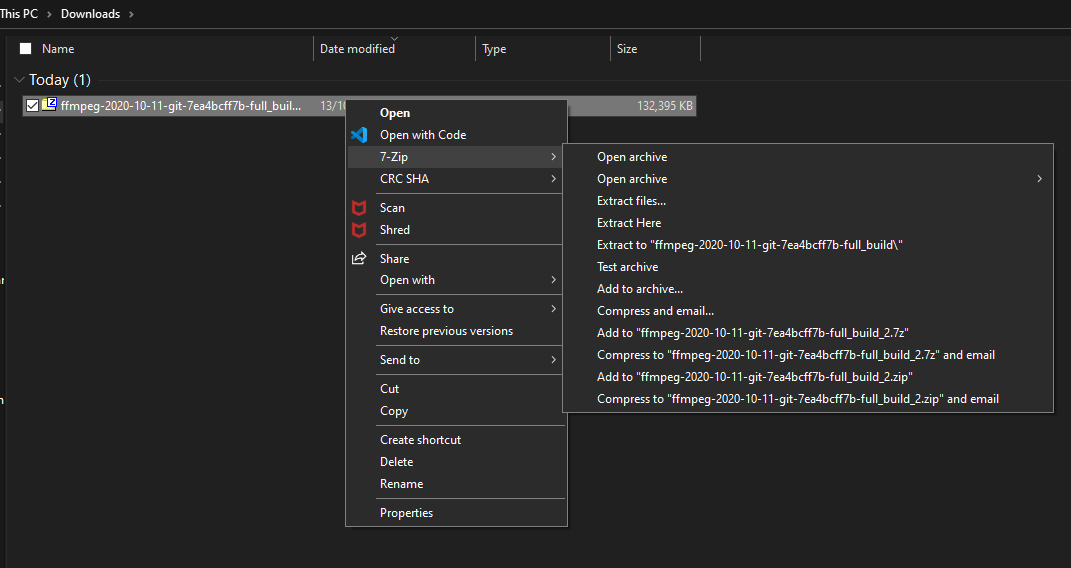
Navigate to where you downloaded the file, then extract the zip file.
Rename the extracted folder from 'ffmpeg-xxxx-xx-xx-git-xxxxxxxxx-full_build' to just 'Ffmpeg'.
Right click the extracted folder, and press 'copy'.
Then, on the file explorer, click 'This PC', then click onto your PC's hard drive (normally called 'OS (C:)'' or 'Local Disk (C:)'. Paste the folder on this page.
FFMPEG is now installed on your computer! But there's one more thing you need to do to start being able to use it from the command-line. Keep reading.
Open control panel on your computer. You can do this by just searching for 'control panel'.
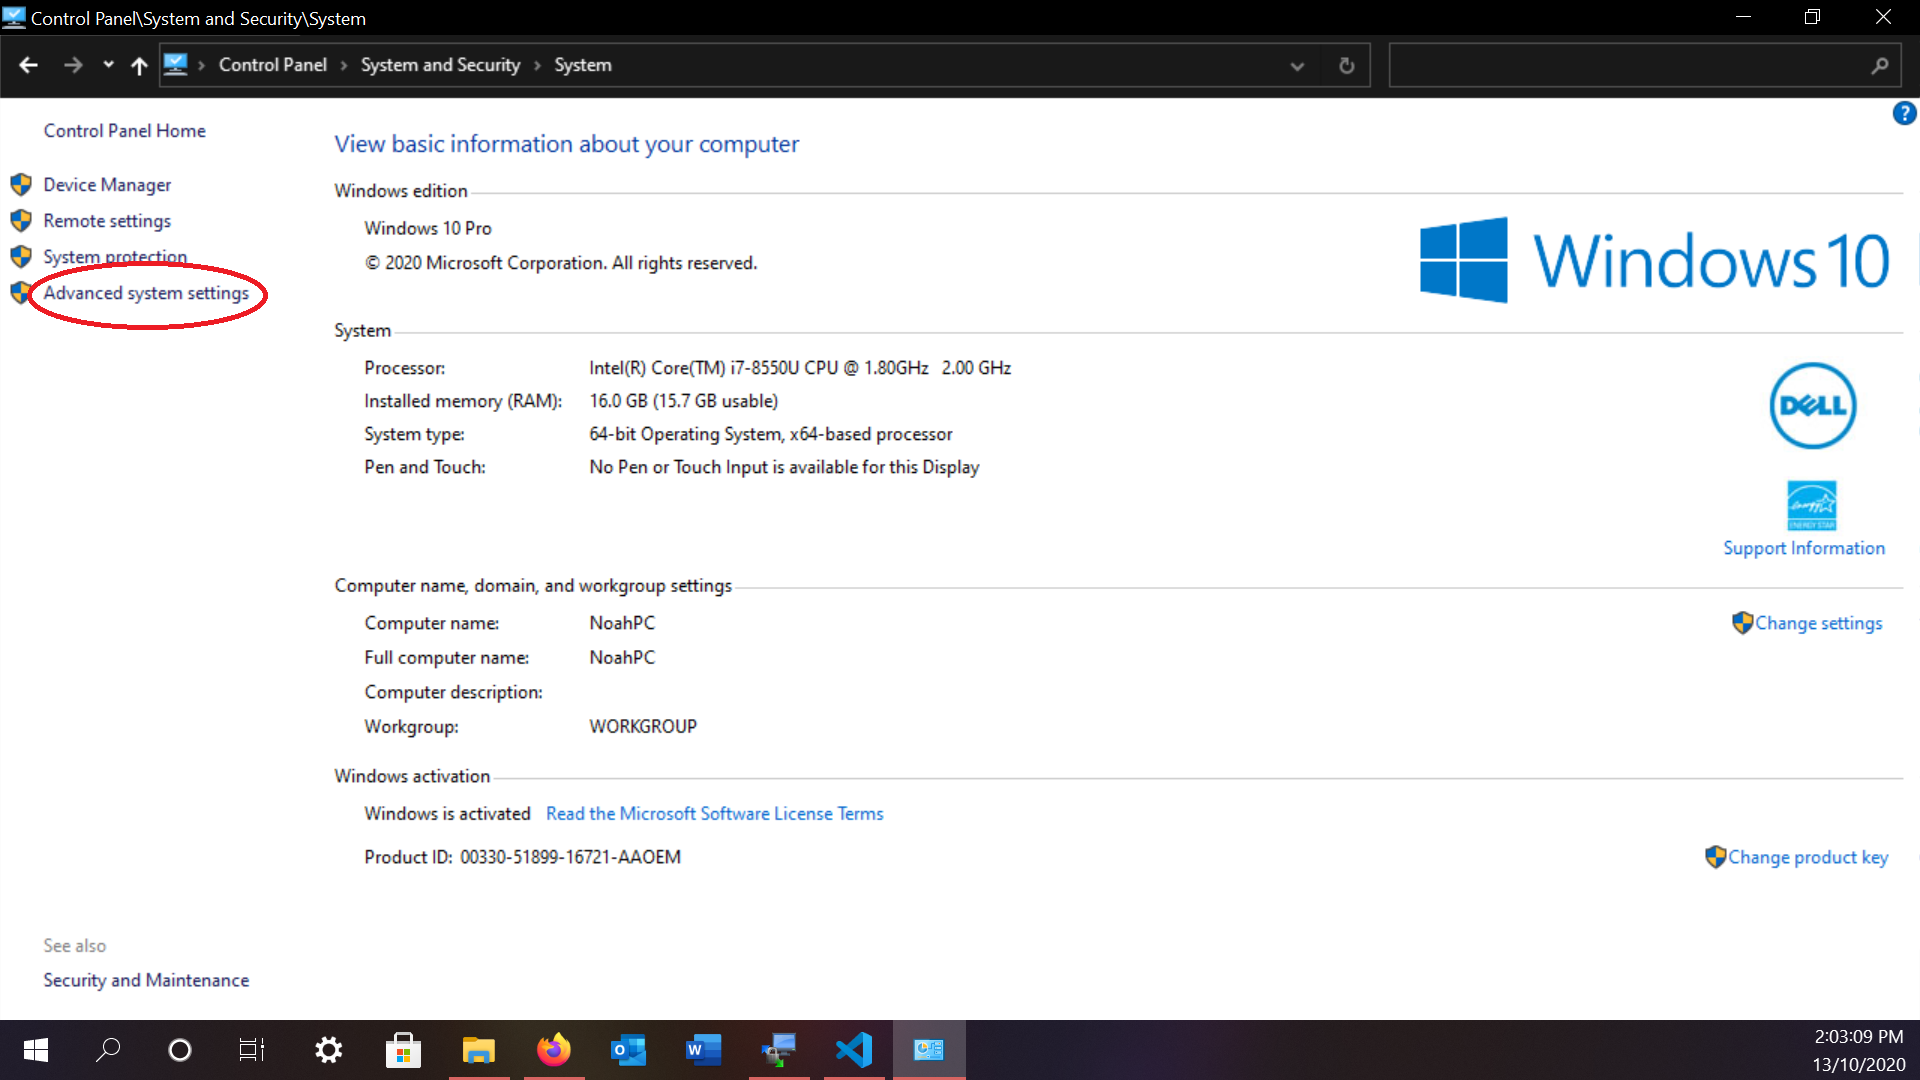
Press 'System and Security' on Control Panel, then press 'System'.
On the bar on the left side of the page, press 'advanced system settings'
On the dialog box that opens, near the bottom right, there should be a button that says 'Environment Variables'. Click it.
Another dialog windows will open. In the box on the top half of the window, check if anything says 'Path' in the left column. If it does, click on it, press 'Edit', then press 'New', then type C:\Ffmpeg\bin, then close all the boxes. Ffmpeg is enabled! If there isnt a 'Path' column, follow the instructions below:
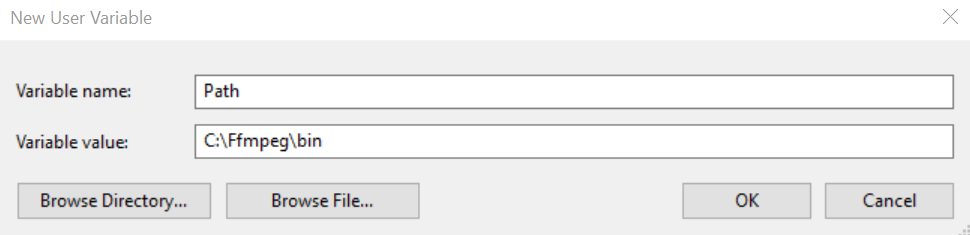
If you don't have a column that says 'Path', press the 'New' button, make the variable name 'Path', and the variable value C:\Ffmpeg\bin. Then press ok, and close all other boxes. Ffmpeg is enabled on your PC!
Open Command Prompt by just searching for it, and type ffmpeg into it. If FFMPEG is enabled, it should look like the image below:
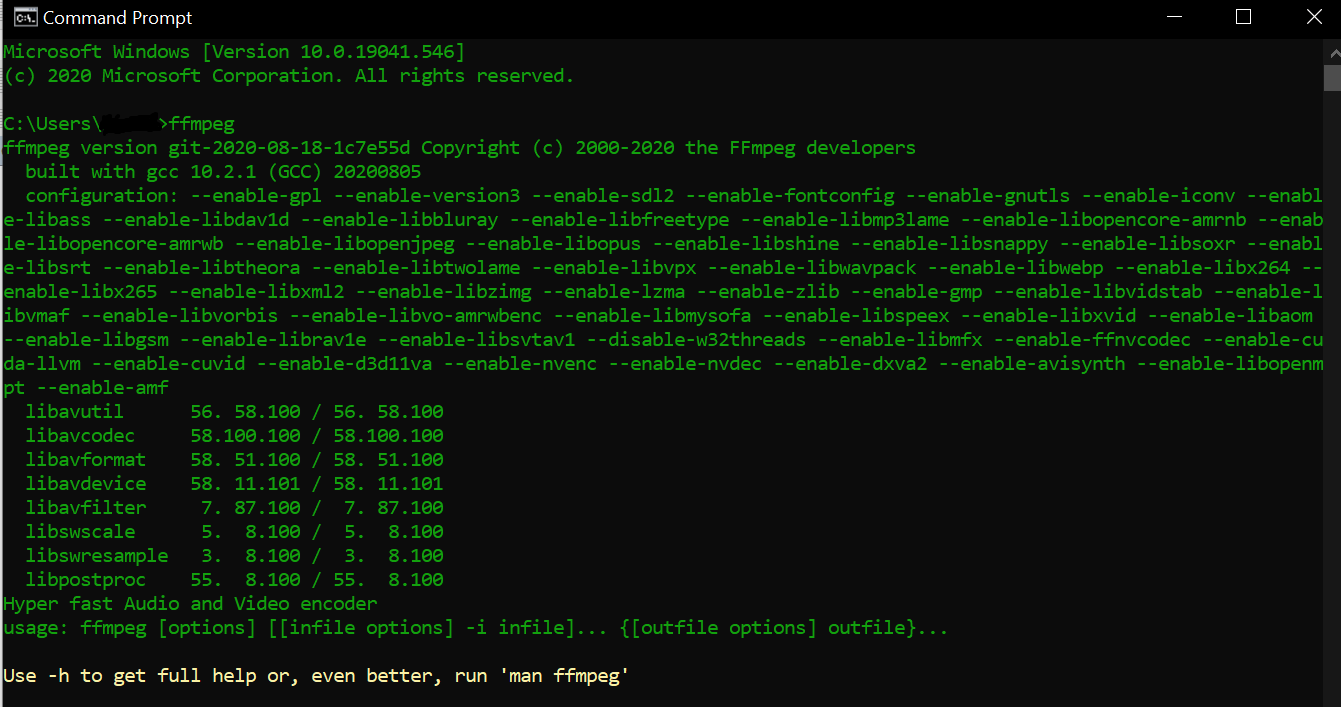
If it does, then congratulations, you're all done! Otherwise, check that the file path is actually, C:\Ffmpeg\bin and not something like C:\Ffmpeg\ffmpeg-xxxx-xx-xx-git-xxxxxxxxx-full_build\bin. Also ensure that you created the PATH variable correctly.