This is probably one of the most convenient ways to change the operating system of your computer (or even have a portable operating system that works with any computer!). A while ago, if you wanted to switch operating systems (e.g. switch from Windows to Ubuntu or vice versa) you would have to buy an installation disk, or burn an installation disk yourself.
That process can be really slow, but now, you can do it yourself, storing it in the handy format of a USB! This USB can then be used to install another operating system on a computer, or you can use it as a portable "computer" you can plug in and use everywhere.
This is how I've installed Windows and Ubuntu on different computers before (yes, it will also work for any other operating system). As long as you follow the steps carefully, you'll be up and running on a new system in no time!
You should also have a USB with a bare minimum size of 4GB.
If you've got a fairly new computer, this shouldn't be a problem for you.
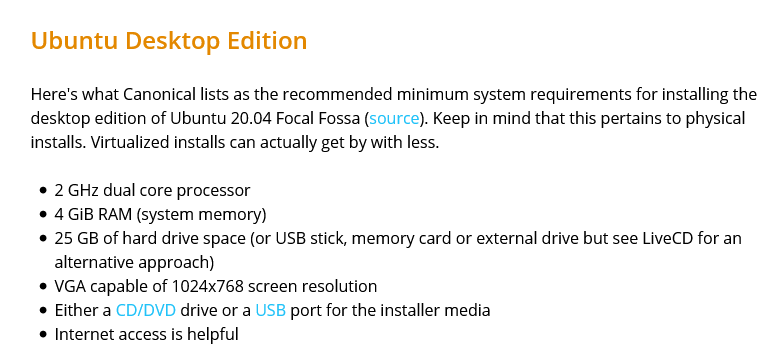
Finding the system requirements for an operating system is pretty easy - simply searching [operating system name] minimum requirements in a search engine should show you some results, but make sure they're for the correct version of the system you want to install.
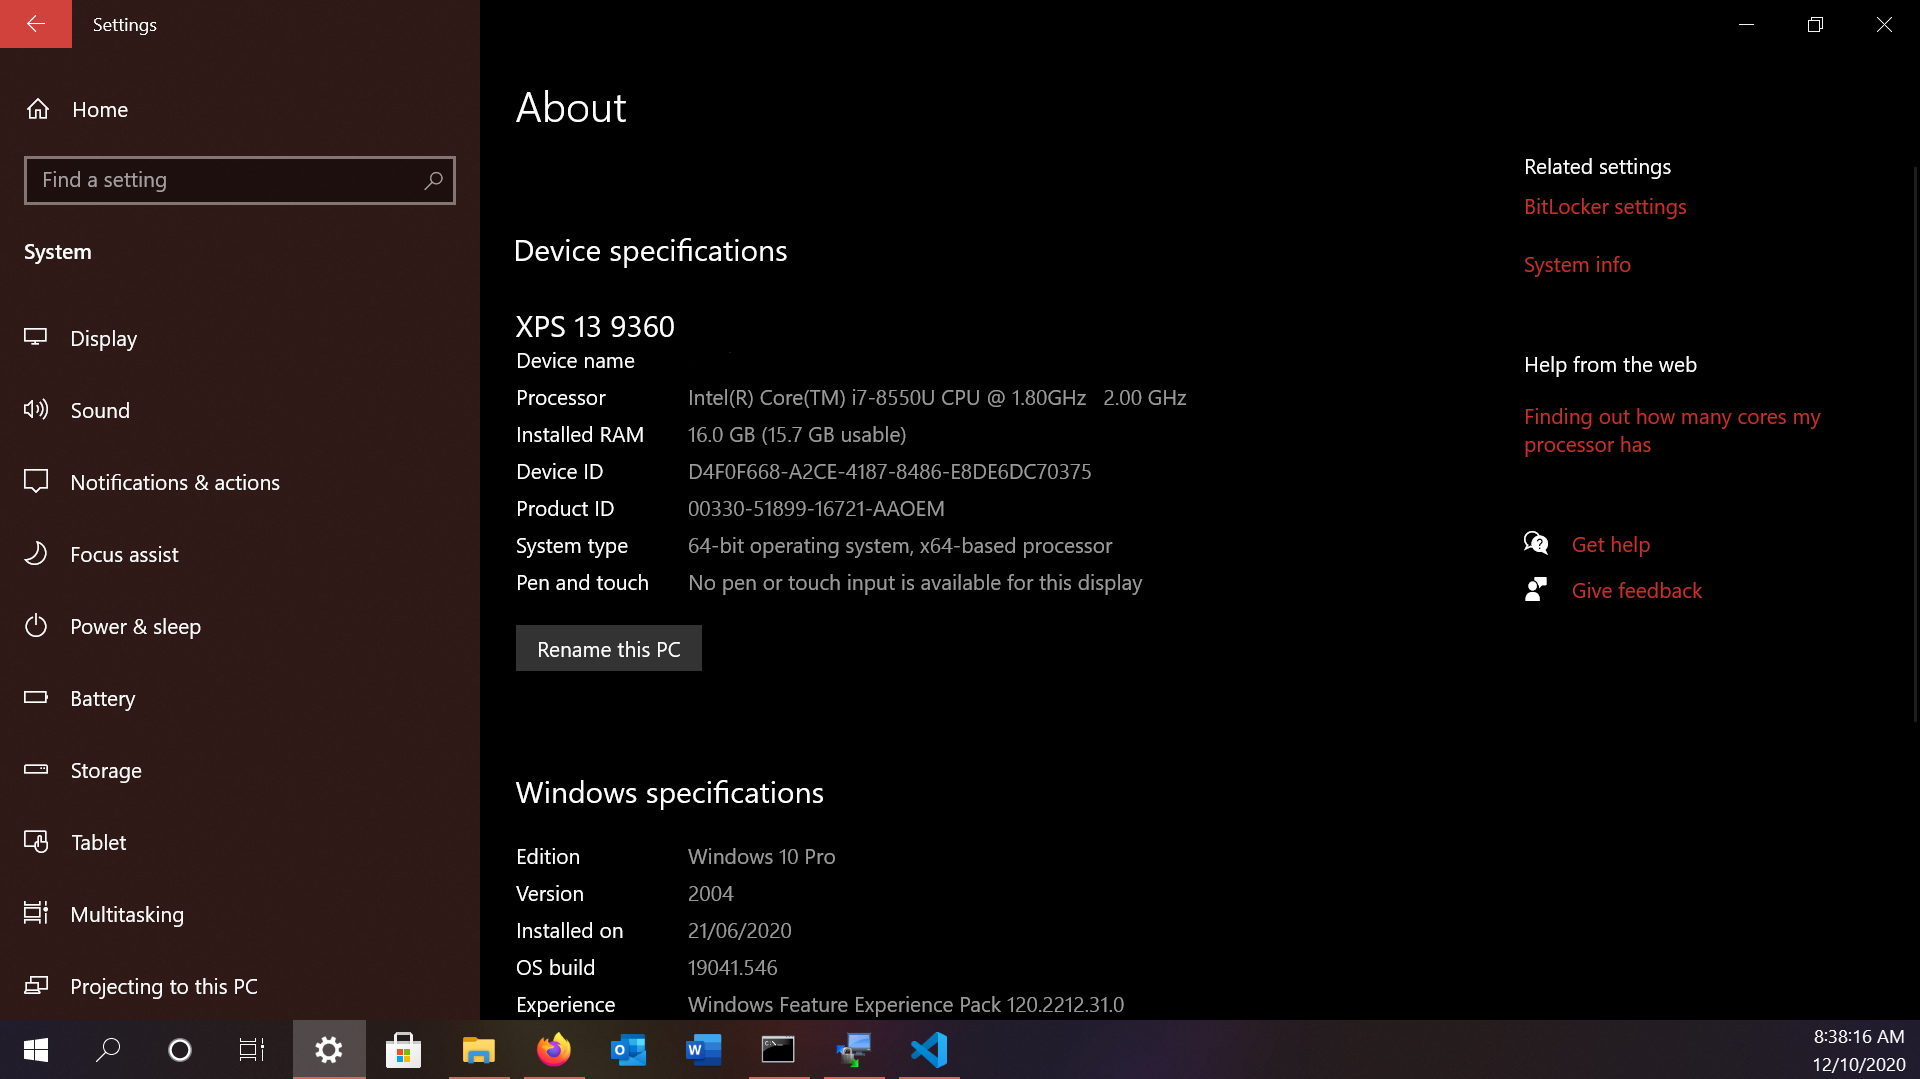
You should check these requirements against your computer's specs:
If you don't want to keep anything on your computer, skip this step.
This part is really important, because installing a new operating system completely wipes your computer's drive. I suggest saving everything you want to keep somewhere on a different USB.
Navigate to the official website for the operating system, then find and download the operating system you want.
The file type it should be downloading should end in .iso. This is essentially an exact 'digital version' of a disk, and what we're going to use to install the new system.
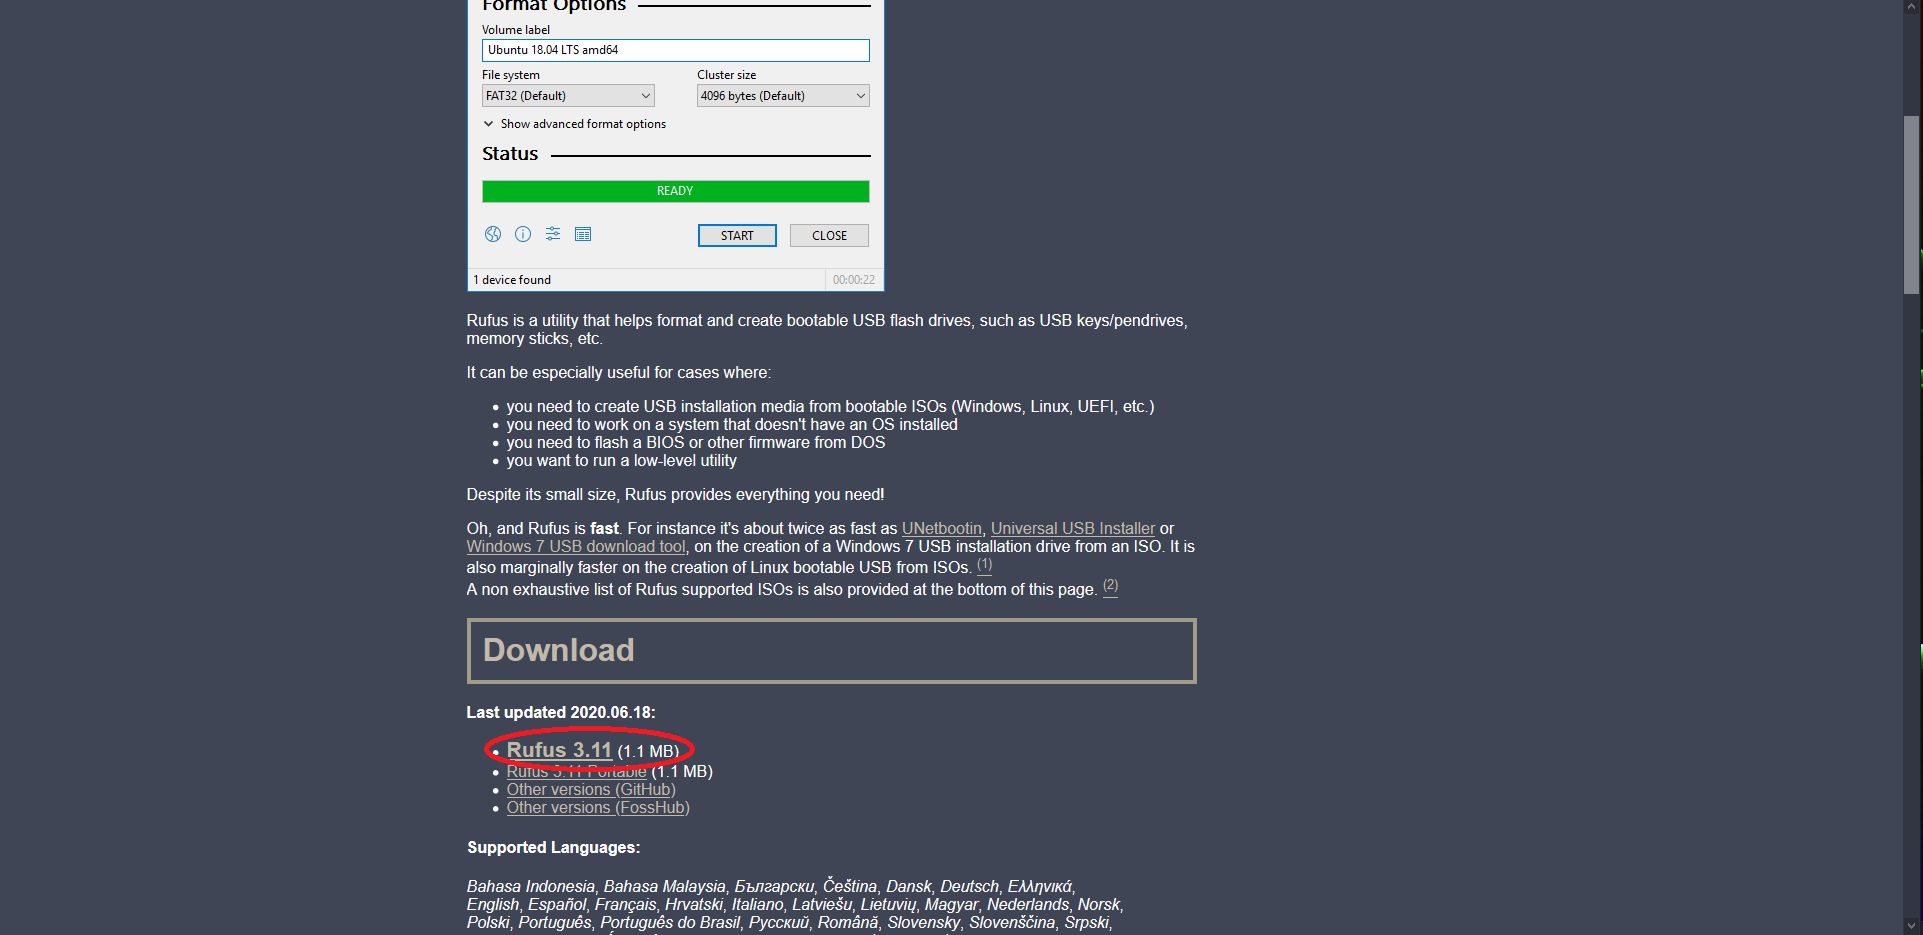
Rufus is a pretty handy little program that helps you make your USB bootable (meaning you can use it on a computer).
Go to their official website: rufus.ie and download the latest version of their program.
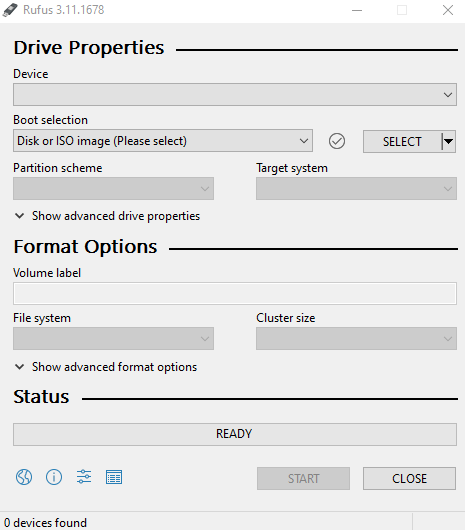
Then, navigate to where you downloaded Rufus, and run it.
Hopefully, your .iso operating system file has downloaded. If not, wait until it has.
Follow these instructions carefully:
.iso operating system file, then choose it.It should now look something like this:
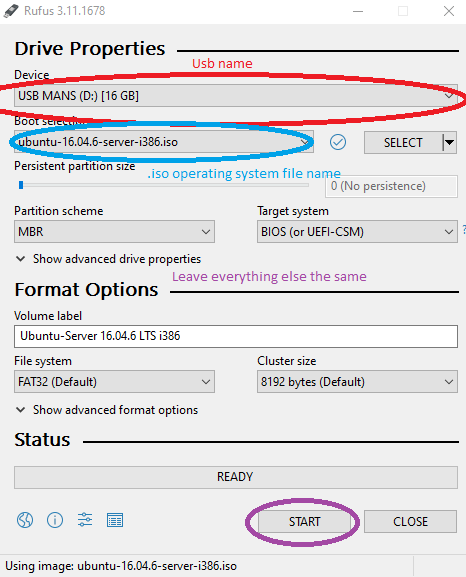
Then press the START button.
It'll give you a warning that everything else on the USB will be erased - just click OK.
After some time (maybe around ~10 minutes or less) it should be finished. You can now close Rufus. The USB is now bootable!
You're now ready to install the new operating system on your computer!
Once you're ready, and you're 100% sure you want to do this, follow the instructions below:
I recommend just reading the steps first, so you know what's happening and you're reading for it.

At some point during this part of the installation, it may ask you to 'delete partitions' on your hard drive. Delete them all so you have as much disk space as possible and no other issues are caused.
Enjoy your new operating system!